Aug 31, 2016

When AVD exceeds the max specified in your HAXM configuration

Android developers can debug and build .apk and run in real device without AVD (Android virtual device) emulator. Sometimes it is easier and convenient to use AVD than searching for the real device! But many people come across the following error while launching AVD. Hence you will not be able to run your app. The reason for the issue is insufficient RAM allocated for HAXM during installation. But now you’re trying to exceed creating AVD emulator with higher RAM requirement.
The solution no1 is to reduce the emulator requirement which is the temporary solution or solution number to is reinstalling or changing RAM size of HAXM.
Problem:
>> 
emulator: The memory needed by this AVD exceeds the max specified in your HAXM configuration.
emulator: AVD      RAM size = 1152 MB
emulator: HAXM max RAM size = 512 MB
emulator: You might want to adjust your AVD RAM size and/or HAXM configuration to run in fast virt mode.
Cannot set up guest memory 'pc.ram': Invalid argument

Solution1:
Tools > Android > AVD Manager > Your Device > Show Advanced Settings > Set RAM to preferred size.

Solution2:
 In Control Panel > Programs and Features > Intel Hardware Accelerated Execution Manager > Change > Set manually > Set to preferred size
>> 

Go to control panel > programs and features
>right click on Intel Hardware Accelerated Execution Manager

click next

click change 

change the proper limit
(This allocates the maximum specified RAM to emulators solving other process) 


HAXM is working and emulator runs in fast virt mode

Aug 30, 2016

How set up the android development environment

Setting up the android development environment in a windows environment is easy.

Download Android SDK from Google.
Download JDK from oracle.


Install the JDK first.
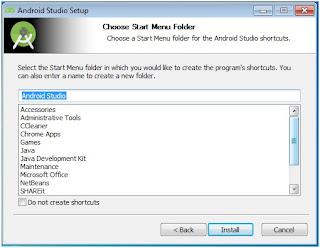
Install the Android studio.


Aug 27, 2016

Developer options in android phone.

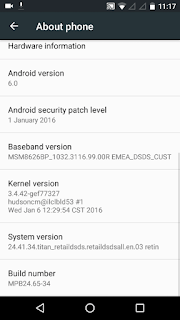
Settings > about phone > tap 7 times on build number > now developer option is enabled.

Settings > apps > settings > storage > clear data > now developer option is disabled and hidden.
Go to settings

slide to about phone option at the end

tap seven times on build number


Now you have the privilege of developer 

Now you can see the developer option in the settings

Now you can set different options within developer option 

To disable and hide the option go to apps in the settings

go to storage

clear all the data, that means you reset the settings


One of my video on the activating- deactivating developer option in moto g 2, marshmallow 

May 18, 2016

How to restore your Sony Vaio laptop to its authentic windows version.

How to restore your Sony Vaio laptop to its authentic windows version?

In my case I am using Sony e series SVE14133CNW laptop
If you have upgraded before the latest one will be recovered.
Step 1: shut down laptop completely
Step 2: press assist button at the top
Step 3:  In rescue mode select recover or maintain your system

Step 4: choose the language English

Step 5: choose your key board layout US

Step 6: choose an option trouble shoot

Step 7: In the recovery tool choose the OS

Step 8: select C drive only and keep the files to avoid the deletion of other drives
It takes around 45 minutes to recover.